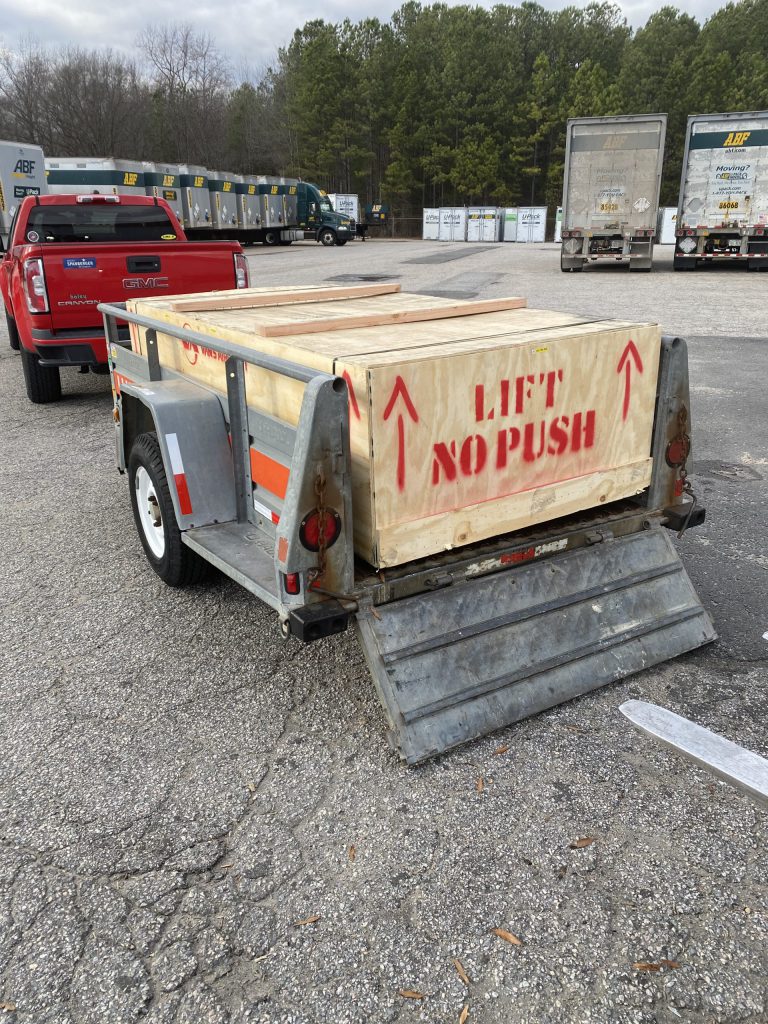
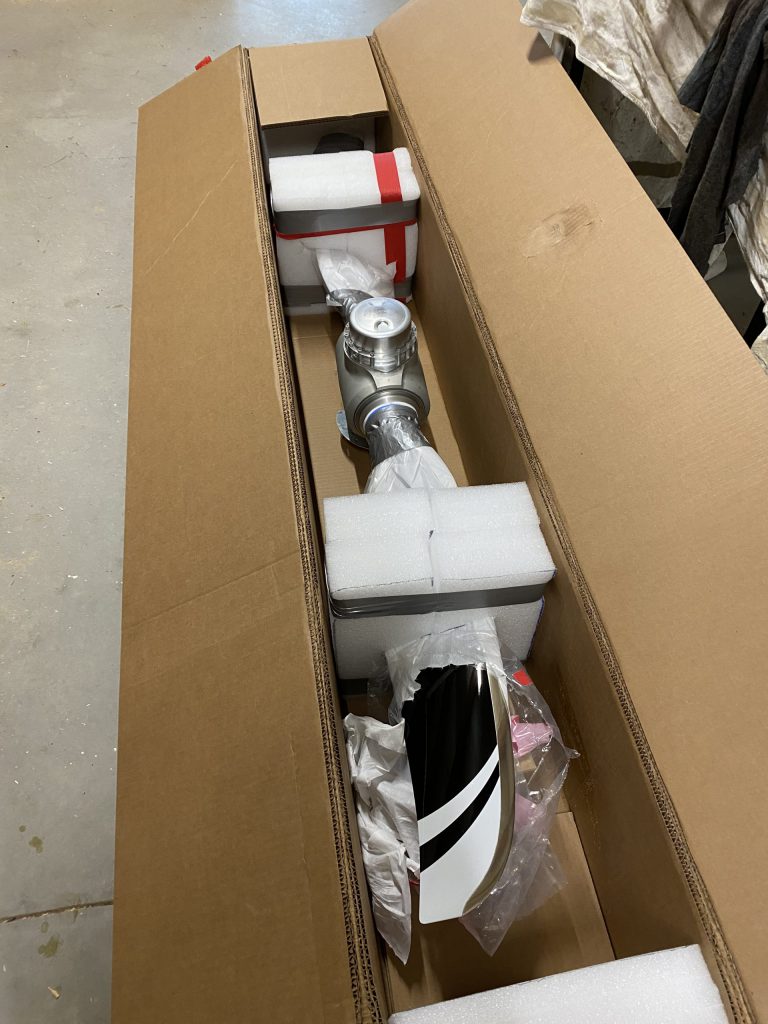
I picked it up at the ABF freight terminal this afternoon. No damage to the box. I found out that a friend of mine is the loading dock foreman there so he helped me get this BIG box onto the trailer (it just fit on the 5×10 U-Haul trailer). The only problem is that I had no way to unload it at the house other than to open it and remove all the parts. On perhaps the most windy day of the year I had packing paper flying everywhere.
Now the canopy and the back window plexi-glass are safely upstairs in the house where it is reasonably warm. The rest of the stuff is downstairs ready to be inventoried.
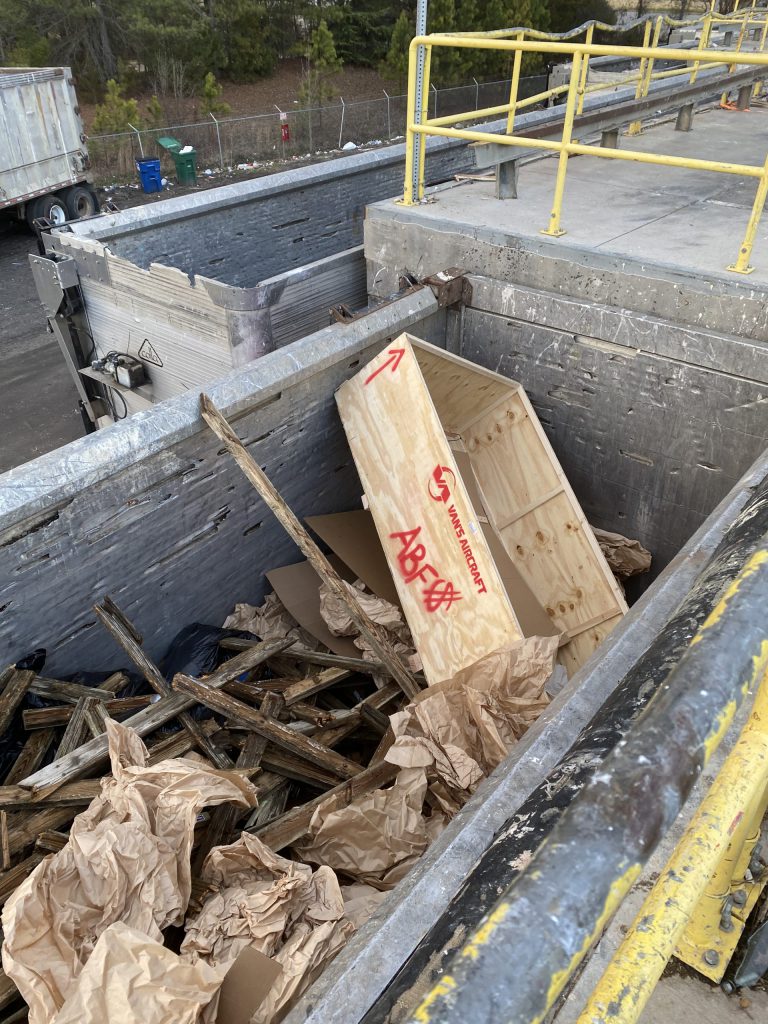
The shipping container ended it’s life at the county dump.
There were a few things on back order, but now I will be able to continue building for awhile.
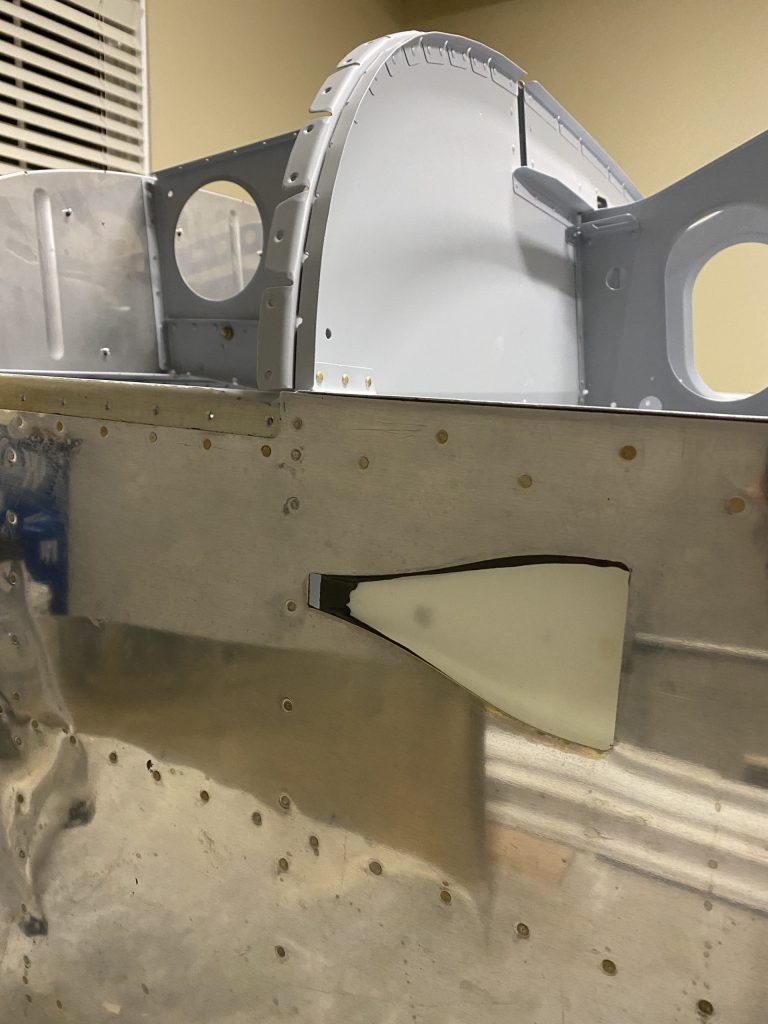
Somehow when I installed it the NACA vent on the left side moved backward about half an inch. I didn’t notice it for a day or so and by that time the ProSeal had set up completely. My first inclination was to leave it as is and “repair” it with a bit of extra fiberglass. Jon and I discussed it and decided to remove the vent.
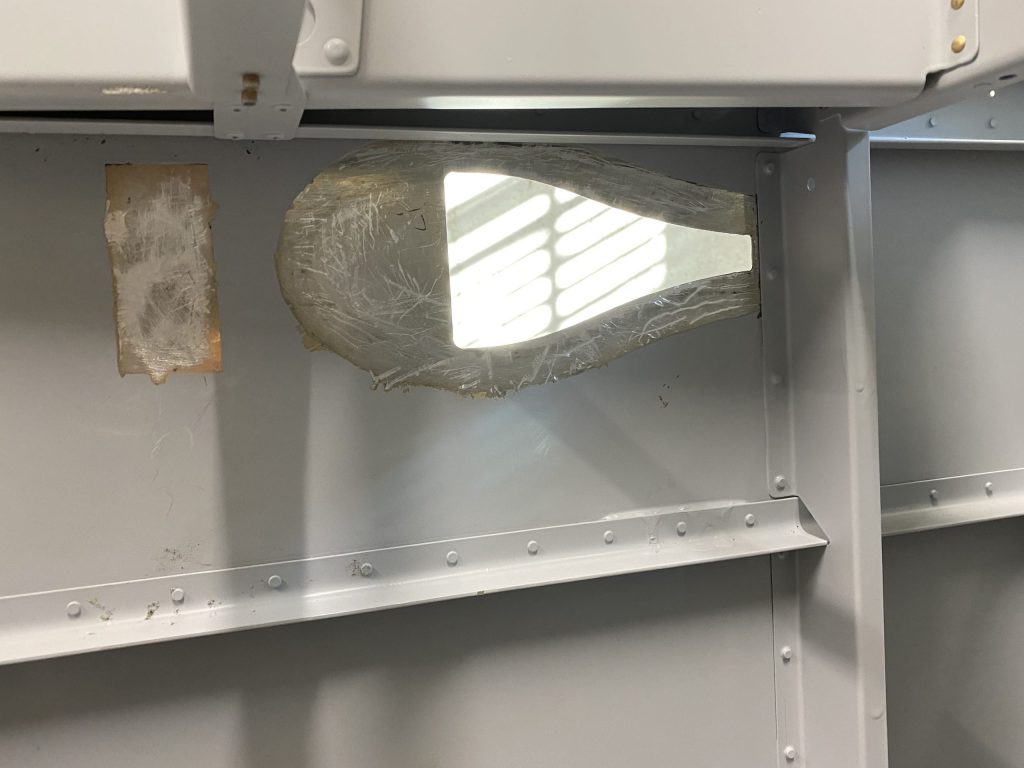
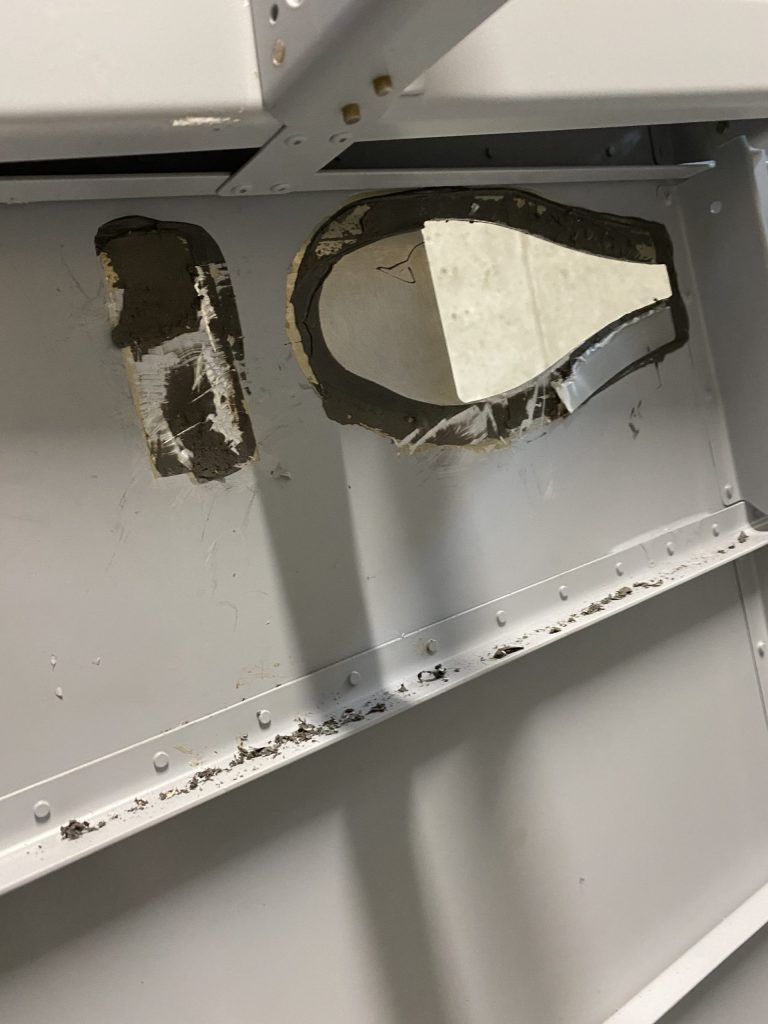
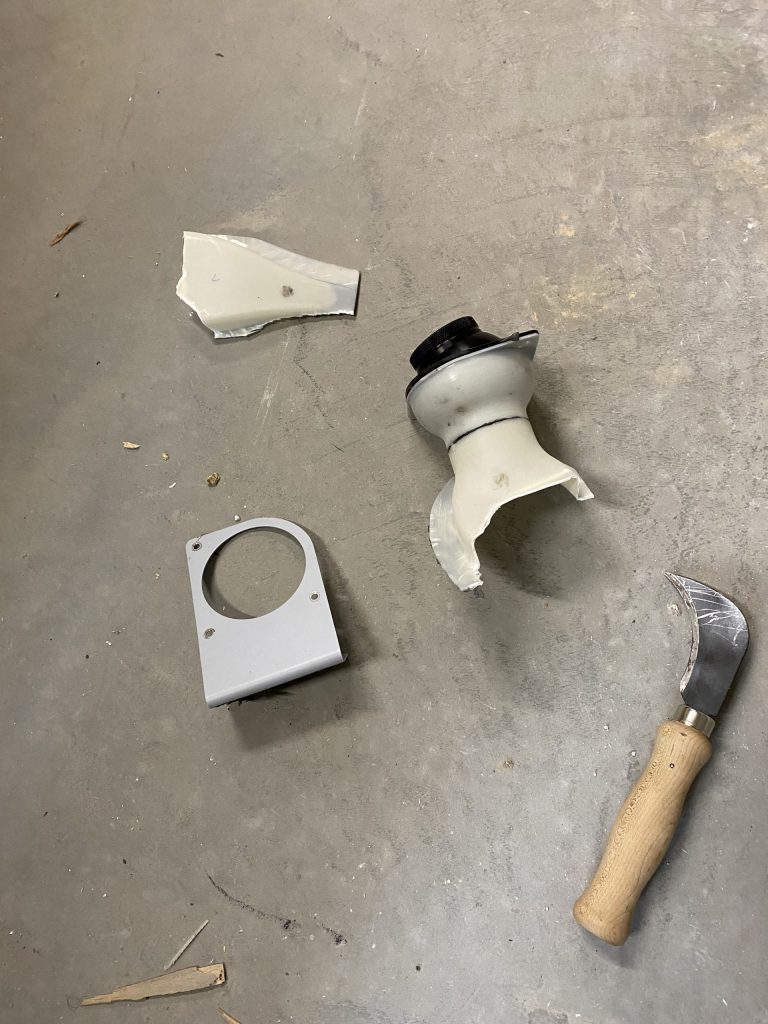
Using a safety knife and a carpet knife I was able to cut through most of the ProSeal to remove the vent. Unfortunately, during the process I had to destroy the vent itself.
I salvaged the eyeball part ($160) but will have to re-buy the fiberglass NACA vent which isn’t too expensive. I have about another hour of effort to remove the last of the ProSeal that is still on the inside of the fuselage skin.
Hours: 2
It looks uglier than it actually is. With a bit of scraping and some chemical treatment I think I can remove the last of the ProSeal.
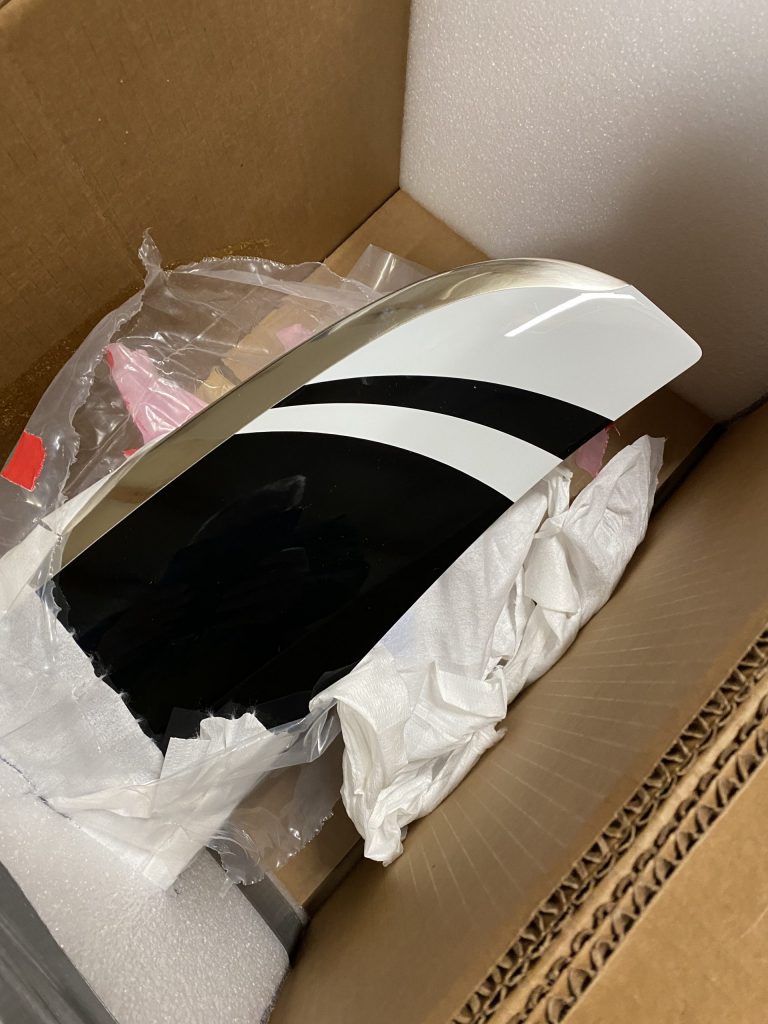
The Whirlwind propeller arrived today and it is beautiful. I opened the box just to look at it despite not being able to do anything with it for at least three months.
Meanwhile, I got news that the finish kit will arrive at the freight terminal next Friday. It weighs 411 lbs and is 98″ x 49″ x 30″. The shipping charges were $770.00. If I had had it delivered to the house it would have cost an additional $70. I wasn’t sure when I was going to be home so I decided to just have it shipped to the terminal and then I can rent a trailer to go get it.
The panel is still being built at SteinAir. According to Nick, the panel has been cut and painted, but the technicians still have 4 to 5 panels in front of it. Still guessing it will be mid-April.
This was one of those rare days where things went smoothly with no mistakes, re-dos or other issues.
I got both sticks in. The cross connect is a bit challenging because there isn’t much room to work and there are washers and spacers that all have to be installed. I checked the alignment between the two sticks and the stick travel (fore and aft) and both were well within tolerance.
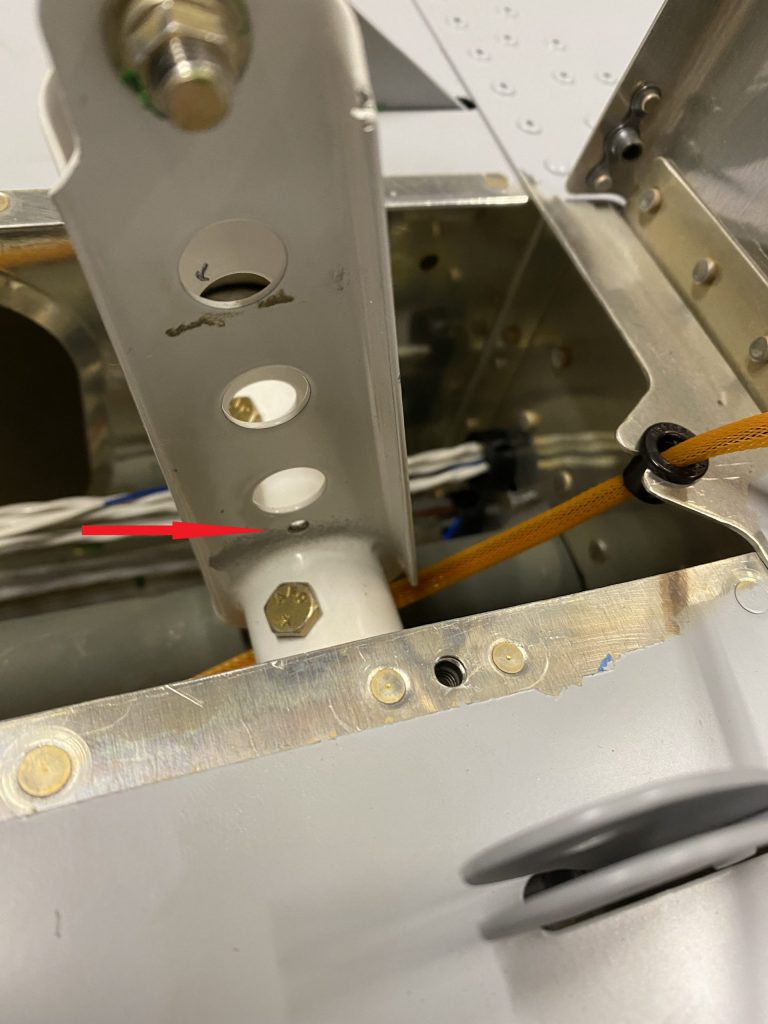
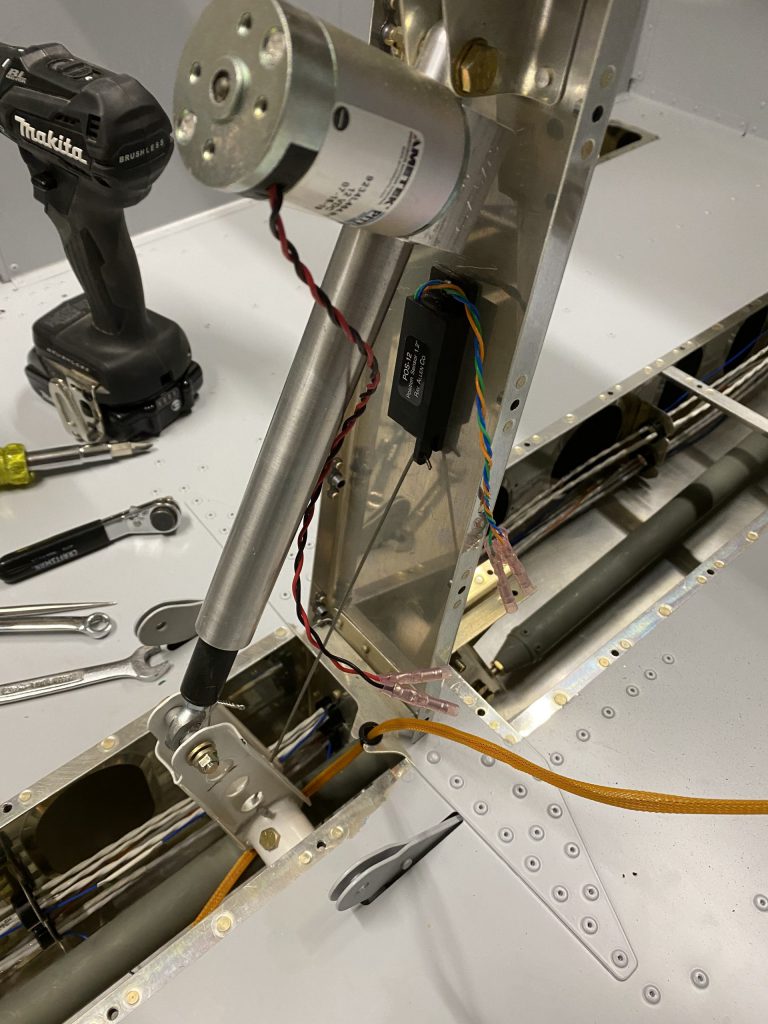
I then worked on the small Ray Allen sensor that is used to send the flap position to the EFISs and power controller. I was expecting this to be more difficult then it turned out to be. I had to remove part of the flap assembly that had been installed earlier so I could drill a hole in it but this was pretty straight forward. I still have to run the sensor’s wiring to the panel (when the panel arrives that is).
I got good news on the propeller and the interior. Both should ship in the next few days (a bit ahead of schedule). The finish kit should be in the crating process now so that should be coming in the next three weeks or so.
The instrument panel is being built at Steinair now (due in April-ish). The engine is likely to be mid May.
Jon and I have decided to remove the NACA vent that moved during install and redo it. Sucks, but in the end it will be better.
Hours: 2.5
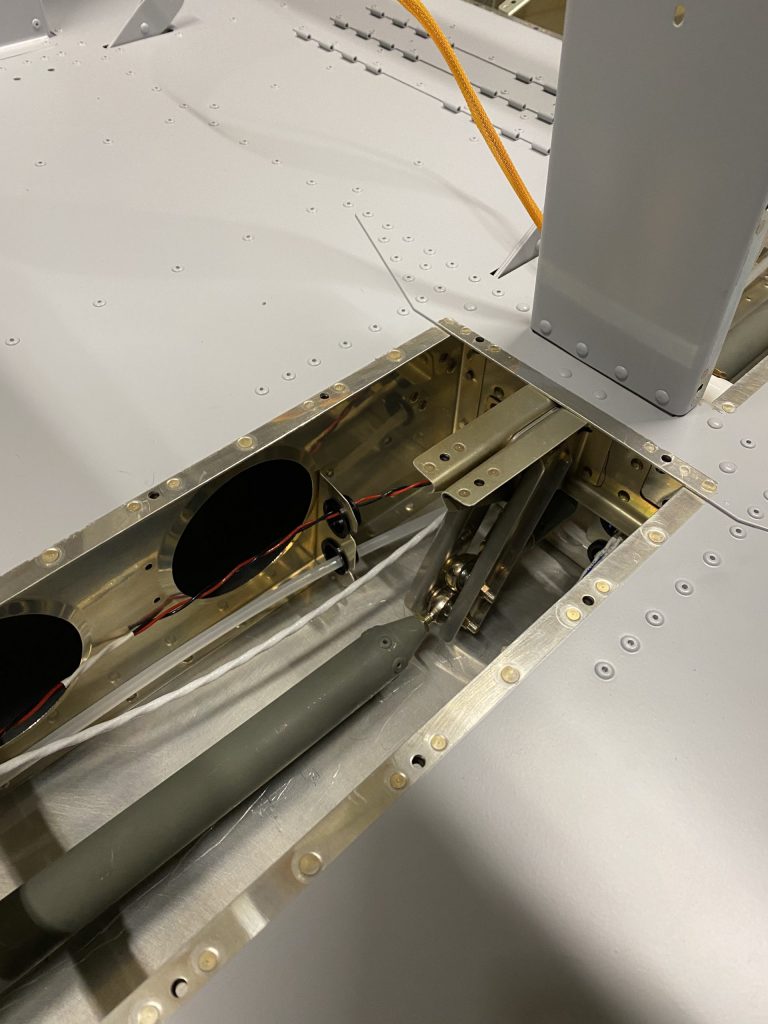
The sticks need to move forward and backward from -13 to +23.1 degrees. The cross connect is a total PITA because it is difficult to get the bolt, washers, spacers and nut on. An alignment pin makes it a lot easier.Strangely, Van’s plans have you install the flap actuator in section 34 and then disassemble it in section 54 to put the sensor in. I think the reason is that the sensor is actually optional. The red arrow indicates the new hole you need to drill to take the push rod from the sensor.The position sensor installed. The plans call for a piece of flex tubing PT-PU-.066 but I have no idea what that even is. I ended up using a small piece of fuel line tubing I bought at a Hobby Town (used for R/C airplanes). Pro Tip from Jon: use a 9V battery to move the flap actuator when you are determining the exact position of the position sensor.
As usual a couple steps forward combined with a step or so backward.
We removed the airplane from the rotisserie (so we could access the firewall).
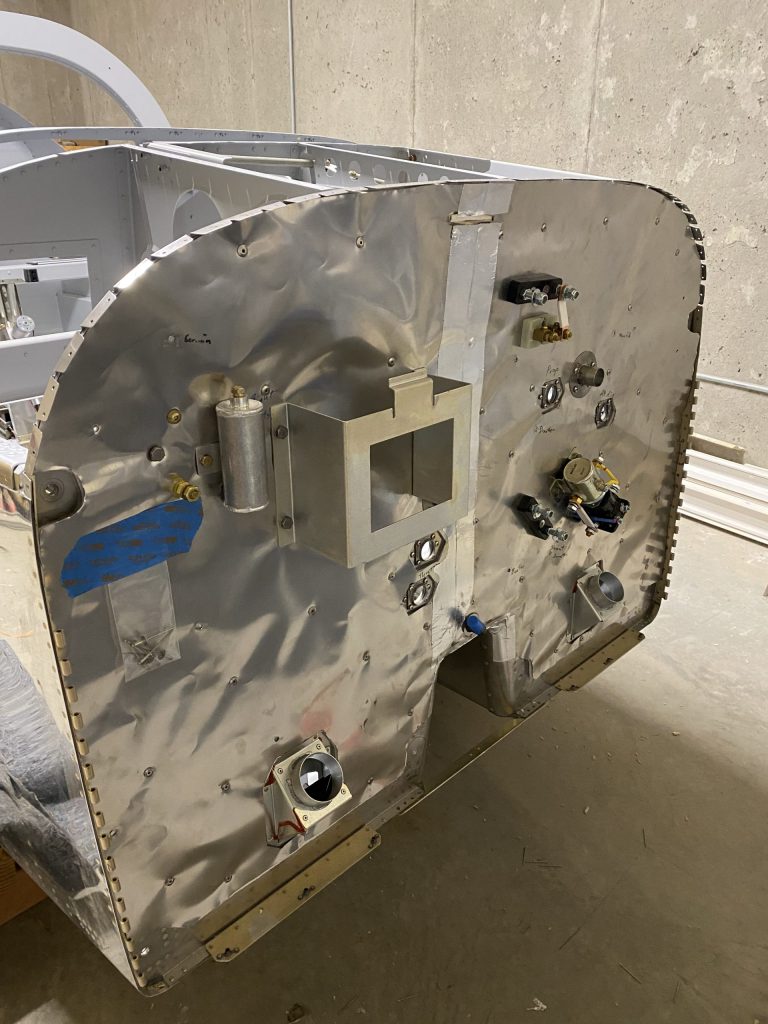
We worked on the stainless steel/fiberflax barrier for the firewall. This is designed to prevent a firewall forward fire from penetrating the cockpit. The challenge is that there are all kinds of penetrations that have to be cut out. Stuff like the master solenoid, the starter solenoid, the brake master cylinder, and various other components that are either mounted on the firewall or pass through the firewall.
There were also about 50 stainless steel rivets to install that hold the insulation “sandwich” to the aluminum firewall itself.
I installed the idler arms and linkages for the elevator control tubes. Not that difficult though I spent a fair amount of time getting washers and nuts all lined up in a fairly confined space.
I put the left stick together (twice since I initially had it backward) and installed it in the airplane. I will do the right stick next time I am in the workshop.
This is where I made my mistake that will require ordering more parts from Van’s. The top forward edge of the firewall has a piano hinge that is used to secure the back of the engine cowling. I carefully followed the directions but ended up with the holes too close to the edge of the hinge (I contend the plans have an error in them). The part is only $17 and I will add it to the finish kit which is being crated as we speak. Hopefully, I will have it in two weeks.
I also found an “oops” from a previous work session (NACA vent moved).
I got word that the Lycoming Thunderbolt engine that was originally supposed to arrive in March is now scheduled for May. Not too bad since I suspect I won’t be ready until late April anyway.
Propeller should be sooner. Also the interior (seats, stick boots, side panels etc.) should arrive from the manufacturer in Europe in about three weeks.
It is definitely starting to look like an airplane.
14 hours (2 people times 7 hours each)
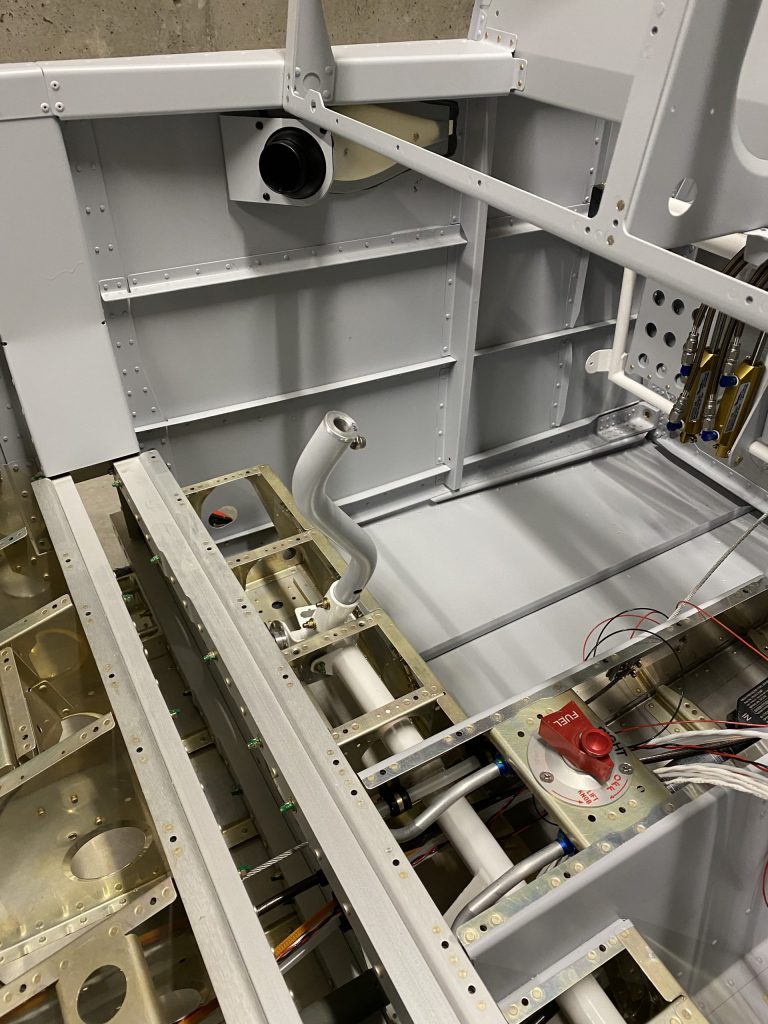
Battery box , master cylinder, fuse blocks, solenoids etc. The piece of blue tape is just there to hold a small baggie of stainless steel rivets to remind me to put those last 4 rivets in after I confirm the cut outs for the motor mounts are the correct size.Idler arms and elevator control tubes installed.Pilot’s stick installed.Here is the “oops” that will be difficult to fix. The NACA vent moved backward about half an inch after I installed it with ProSeal. Here is the $17 mistake. That piano hinge needs to be set back more flush withe the front edge of the top skin. The drawings have it out that far, but when you match drill the holes they end up very near the back edge of the piano hinge. BTW, squeezing that many clecos (putting them in and taking them out) can really do a number on your hand muscles.
Jon stopped by to work on some more fuselage / tail interior items. We focused on completing the brake lines, installing the elevator control linkages and installing the pitch and yaw servos. We also ProSealed the NACA fresh air vent on the left side of the airplane. As usual we have another couple small items to order from Van’s Aircraft (total cost about $2 but shipping will be another $6).
Total time 7 hours (Jon 6, me 1)
This is the end of the brake line on the inside where it will connect to the brake line that will run down the main landing gear structure to the wheel.The smaller server further back is the yaw servo. The larger one in the forground is the pitch servo.
I worked on the canopy hinges, gas struts and the canopy release mechanism. As usual, I put something together, tightened down bolts and then realized that I had missed a step and had to take it back apart. I have to wait for the paint to dry on one part of the canopy hinge mechanism so the total progress was miniscule.
I had planned to do some ProSeal work on the air vent today, but decided to put that off til tomorrow.
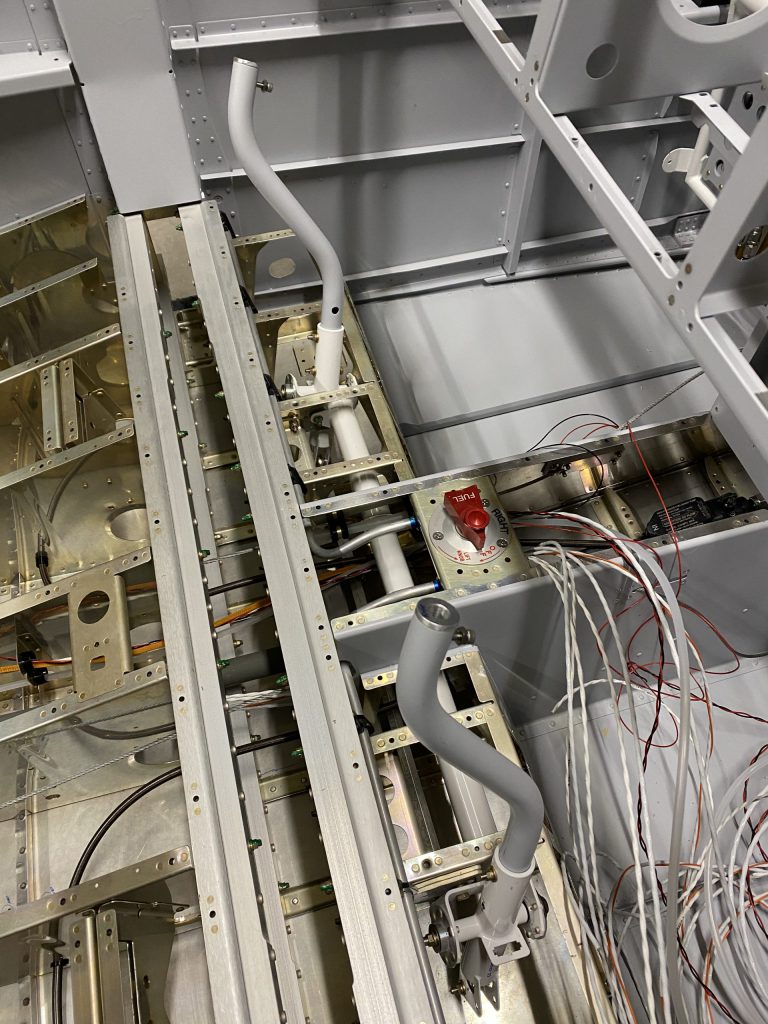
Jon and I got a lot done today. We finished up routing the brake lines. We fixed a couple pop rivets that I screwed up (last post). We installed the flap actuation system. We installed the Forward Upper Fuselage. We pulled several cables from the tail cone forward.
Soon it will be time to remove it from the rotisserie so we can start on some firewall things that are currently unreachable. The rotisserie makes working on the airplane so much easier.
Total time: 12 hours (Jon 7, Me 5).
This is the flap actuation system. The motor is surprisingly small. The orange cable supplies power to the baggage compartment light.The upper forward fuselage is the structure that holds the canopy and the instrument panel. It is riveted to the firewall and to both sides of the fuselage. It also has a center bracket that connects it to the tunnel. In this picture you can see the can of paint I used to hold one of the NACA air vents in place while the ProSeal dries.
I was putting in a small number of AACQ4-6 rivets to hold the plastic guides for the rudder cables. Apparently, my pop rivet tool was not tightly against the side of the tunnel and I ended up with a bad rivet. Normally, not a big deal — just take it out and put a new one in. Except I had exactly zero AACQ4-6 rivets left. Oh well, a call to Van’s to order $8 worth of rivets and a small assortment of other stuff I needed…