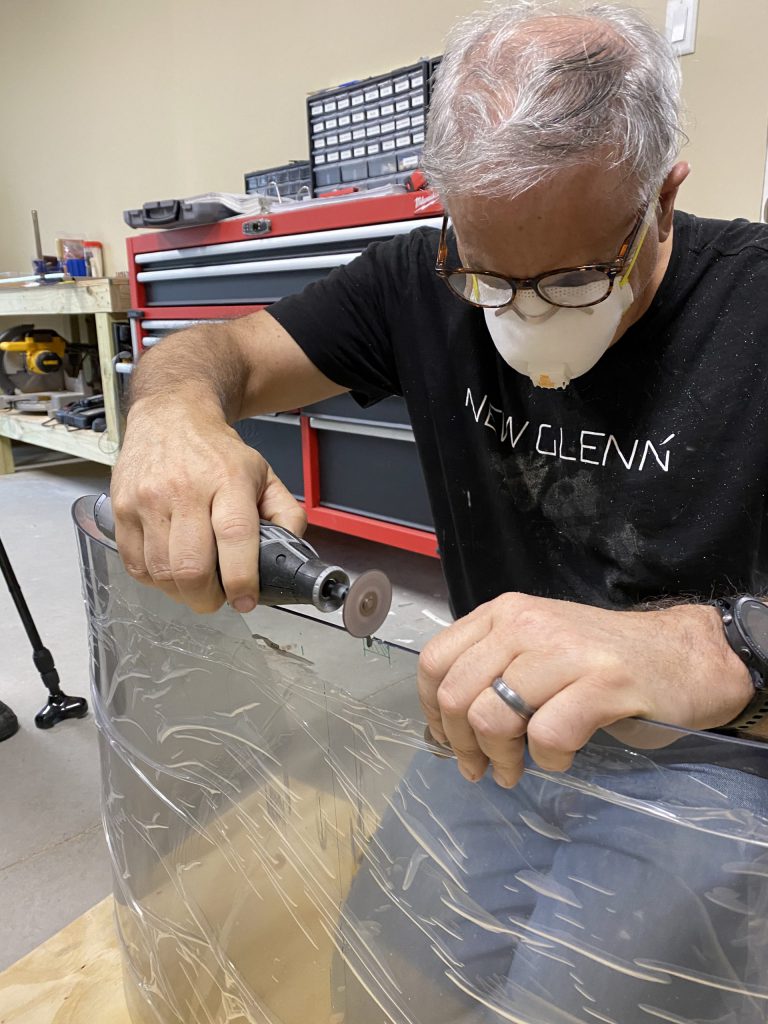
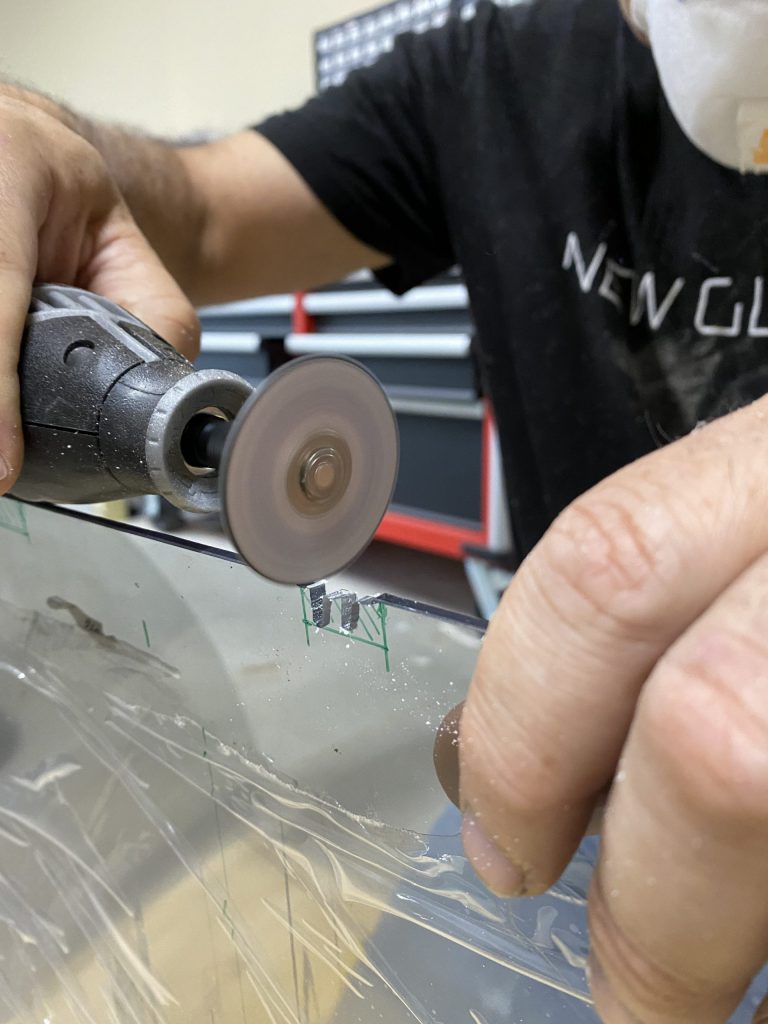
Fixing a Mistake

I mentioned this before, but I realized that I wouldn’t be able to install two rivets near the canopy aft frame because I had already installed the canopy latch mechanism. I certainly was not looking forward to uninstalling the latch mechanism just to put in two rivets on each side. Last night, my father and I decided to do it. It probably took about 2.5 hours to uninstall, rivet and reinstall everything. Very frustrating!

Funny story, I very nearly managed to get a closed end ratcheting wrench stuck in such a way that I would not be able to get it out. I was tightening a bolt for part of the latch mechanism when I realized that the wrench on the nut side was trapped between that bolt and another nearby bolt. I couldn’t back the bolt out because my wrench would just ratchet when I turned the bolt. I yanked, pried and cursed. I seriously thought I was going to have to leave the wrench where it was forever. I finally managed to get a second skinny open end wrench on to the nut so I could back the bolt out. Man, that was close!

Canopy Riveting and Rear Window Installation

We began riveting together the forward canopy assembly. Lots and lots of rivets most of which needed to be bucked rather than squeezed.

Also put the rear window in place for measurement and cutting. It turns out that the only cutting required was the two notches for the roll bar brace brackets. The Dremel tool worked well for the cuts. I did realize that I will have to disassemble some of the canopy latch mechanism to get to two rivets that need to be squeezed. My fault because I did the latch mechanism out of order. Probably 1 hour of extra work. BTW, cutting the plexiglass is messy and requires wearing a mask.

10 hours (2 people x 5 hours each).

I cut downward with the wheel but I found that actually moving back and forth was a better method. After cutting, I used 220 grit sand paper to round the corners to remove stress points.
This is the rear canopy assembly just sitting in place. There are two rivets that I can’t install because I installed the latching mechanism.
This is the back window clamped in place. As with other parts of the kit, it fit very well without any significant cutting. Our plan is to use Sikaflex to attach the window rather than rivets and screws.
The forward canopy just sitting where it will eventually go. It hinges on the front.
My Dad (who turns 91 in about a month) helping me with the canopy top skin.

Still More Canopy Work

A few days ago when I was assembling the front canopy assembly, I puzzled over one particular drawing. I couldn’t determine confidently whether the canopy skin went on the outside of the stiffener or the inside. Based on the drawing at the beginning of section 38, I decided the stiffener went on the outside. I did several steps and things lined up nicely so I assumed I had it correct. Well, I didn’t.

Today, I got to a step that had me countersink the OUTSIDE of the stiffener to accept the dimpled skin. Now it was clear that the stiffener went inside of the skin. It seems obvious now, but when I did it a few days ago I am pretty sure I had it right. No damage done and only a few minutes to “fix” the issue.

I then spent a fair amount of time looking forward a few pages in the instructions. Geez, this canopy has a lot of steps! I think Jon’s advice to work in small increments of perhaps an hour in the evening makes a lot of sense. It is easy to feel overwelmed if you are working for 8 hours at a time.

Meanwhile, Steinair seems to be on schedule to finish the panel work by the end of April. Van’s shipped a few more parts that were back ordered in the finish kit. I cleaned the aircraft factory (a little) in an attempt to not work on top of my instructions (which required me to continuously move my work pieces every time I needed to refer to the directions).

Three hours.

Canopy Continued

I spent a significant amount of time assembling the canopy side rails. Lots of clecos to install, holes to final drill or match drill. As I have commented in the past, the quality of Van’s parts is impressive. Mostly a perfect fit. I will have to pause on the canopy now because two of the key parts I need are back ordered (C-1405-L and C-1405-R). I think they should arrive in the next few days since Van’s told me on a recent call that they had received more of these in stock.

Error of the day: I countersunk a hole next to the one I was supposed to countersink. Kind of dumb since I marked each hole I was supposed to do with a sharpie before starting. Luckily, the error will be hidden permanently by another piece that will be riveted over the offending area.

Five hours.

The Canopy Construction Begins

The canopy has a surprising number of parts. After spending a fair amount of time cutting, deburring and Alodining lots and lots of parts, I began the actual construction today.

The good news is that the parts have been going together relatively easily. The pre-drilled holes by Van’s have been spot on.

My riveting has gone from OK, to reasonably good. Once I got the feel of the rivet gun trigger, I mostly have had very good rivets. Well OK, I have put smiles into a couple of them, but luckily they will be in places where no one can see them.

Six hours.

As you will see in a future post, I have the stiffener wrong in this picture. It goes inside of the top skin.

Canopy Latching Mechanism

This took me about five hours. Probably should have taken me about half that much but I took it back apart twice before I got it right. The first time was because I did a couple steps out of order and wouldn’t you know it, the first step blocked me from doing the second step. Follow the freaking directions!

The second time was because I had one of the linkages installed incorrectly which caused it to bind up. After several minutes of head scratching, I saw my mistake and fixed it. The good news is that I was getting better (faster) at putting it together each time.

We decided to replace the Van’s standard latch handle with a much better built handle from a third party source. I think it looks a lot better.

Five hours.

You can see the improved latch handle on the right in this picture. The Van’s supplied handle looks like it belongs on a cheap screen door.

Lots of Deburring

Lots and lots of material preparation. Deburring the parts for the canopy mostly. Only way to describe it is “tedious”.

BTW, the interior from Lemke in Germany arrived. It looks very nice!

Mounting the Alternator Voltage Regulators

The airplane has two alternators (primary and standby). The larger primary runs off a drive belt while the smaller standby alternator is mounted on the accessory drive pad on the engine. They are B&C alternators so they each have an external voltage regulator. Many people mount the regulator(s) in the engine compartment on the firewall. B&C actually recommends they be mounted away from heat, moisture and vibration. Jon and I decided to put them in the “pit” on the backside of the firewall. Much cooler and drier and presumably less vibration in this location — but more difficult to get to if maintenance is necessary.

I will move the engine oil pressure sensor line on the front side of the firewall which has a minor interference with one of the bolts used to mount the primary alternator voltage regulator.

4 Hours (2 people x 2 hours)

Inventorying the Finish Kit

Uggh! What a tedious task. I have been at it for about eight hours (mostly in the evening). So many bolts, nuts, washers, nut plates… I am almost done, I think.

I honestly can’t figure out where a lot of this stuff will go. There are crazy amounts of very tiny nuts that I simply can’t envision where they will be used.

Cowling Piano Hinge

The hinge holds the upper cowling to the firewall. To remove the cowling, you pull the hinge pin out and the cowling can then be removed.

I have struggled with this seemingly easy step for a couple weeks. The instructions appear to have an error in them. The index holes that they call for do not line up with the holes in the firewall flanges and the top skin.

I also was concerned that the holes in the hinge that they call for in the instructions will be too close to the edge of the hinge. I have seen two different tolerances for edge distance: 2 diameters and 1.5 diameters (from the center of the hole to the edge). In this case, that would mean an edge distance of 3/8″ or 9/64″. My first attempt was a little shy of that smaller distance. Perhaps a more experienced builder would have ignored this and continued on but it bugged me.

While doing research on this topic I found Stu’s Aircraft Factory on Youtube. He built an RV-8. He has lots of interesting building tips. He mentioned in one video that the piano hinge supplied by Van’s is MS20257-3 and is susceptible to having broken knuckles (eyelets) over time. He recommended substituting MS20001P-3 extruded aluminum hinge. About 4x more expensive, but I decided to go with it since I had several broken knuckles on the RV-8 and RV-10 that I had owned.

I am confident in saying he was right and the added expense was worth it. Look at the difference between the two parts in the following pictures.

This is the original part from Van’s, an MS20257-3. Each knuckle is just formed by rolling the edge.
Here is the more expensive MS20001P-3 extruded part. You can see each knuckle is one much more substantial piece.

I spent about an hour putting the hinge on and match drilling it. I am happy with the result so far.